Template:R EZ/doc/How to start your articles: Difference between revisions
< Template:R EZ | doc
Jump to navigation
Jump to search
imported>Daniel Mietchen (slight brushing) |
imported>Daniel Mietchen m (header) |
||
| Line 1: | Line 1: | ||
{| class="wikitable" style="margin: 1em auto 1em auto; padding: 6px; background:#fafafa" | {| class="wikitable" style="margin: 1em auto 1em auto; padding: 6px; background:#fafafa" | ||
|+A brief guide on how to set up your article. | |+A brief guide on how to set up your article, assuming that the course homepage has been set up using the [[CZ:Eduzendium#Course_setup_wizard|Course setup wizard]]. | ||
! Step !! Screenshot (click for full-size image)!! Comments | ! Step !! Screenshot (click for full-size image)!! Comments | ||
Latest revision as of 03:34, 17 November 2010
| Step | Screenshot (click for full-size image) | Comments |
|---|---|---|
| Get ready | This is how your article is listed at the course page when it is not created yet. Once you hit the button, it will take you to the next screen that should be similar to the one depicted below. | |
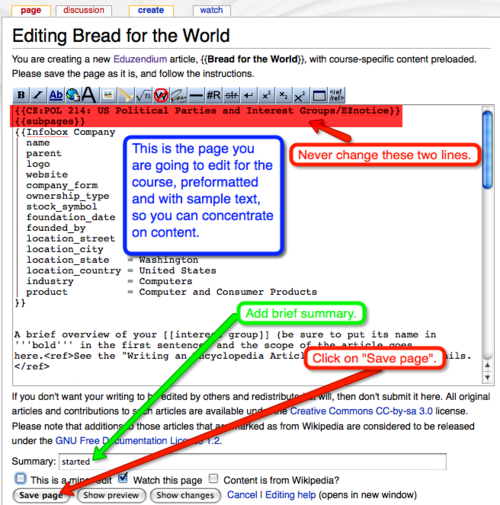
| Save the article in default format | This is your page as it looks like in edit mode. Just type "started" into the summary field, and press "Save page". The two lines on the top (here highlighted in red) are essential for proper formatting of the article. Specifically, the {{EZnotice}} line provides information about your course, and the {{subpages}} line about the various subpages of your article. | |
| Subpages, step 1 | This is how your entry in the course's list should look like if the article has been set up properly but the metadata are still missing. | |
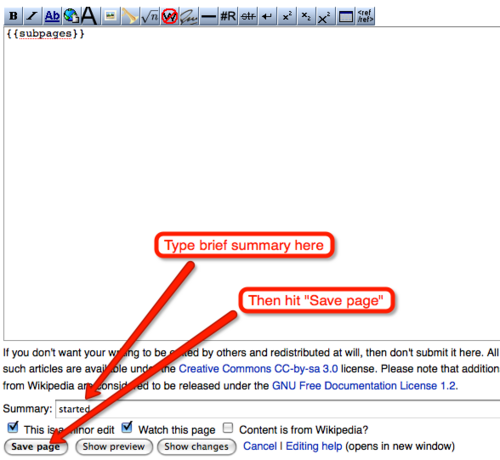
| Subpages, step 2 | Instructions given on the article page after creating the article with the {{subpages}} template. You can either
We recommend the second option. | |
| Subpages, step 3 | The metadata are preloaded with course-specific content. Just enter your article's name in the pagename and abc fields (the latter is meant for alphabetic sorting, where "George Washington" would be turned into "Washington, George"). Do not forget to press "Save page" once you are done. | |
| Subpages, step 4 | The screen you see after creating the metadata template. | |
| Subpages, step 5 | Start the talk page. | |
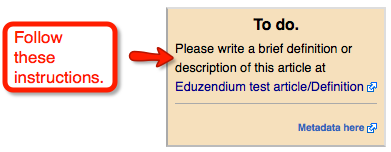
| Subpages, step 6 | Missing definition as indicated on the article's talk page. Start it with what definition comes to your mind — you can always improve it later. | |
| Subpages, step 7 | If you forgot to fill in some necessary data, there are a number of hints built into the system — missing definitions, for instance, are also indicated on the article's main page. | |
| Subpages, step 8 | Definition in place, as indicated on the article's main page. Go back to your course homepage now and check how the listing of your article has changed there, even though you did not edit that page directly. If you want to understand how that works, take a look at Citizendium's templates page. |


